
When it comes to mouth-watering barbecue, baby back ribs often steal the show. Their tender meat and rich flavor make them a favorite for many grill enthusiasts. Whether you’re a cooking novice or a grilling pro, this guide will take you through everything you need to know about these delicious ribs. We’ll cover types, preparation methods, cooking techniques, and even address some frequently asked questions. So, roll up your sleeves and get ready to dive into the flavorful world of baby back ribs!
Understanding Baby Back Ribs
What Are Baby Back Ribs?
Baby back ribs come from the upper part of a pig’s rib cage, located between the spine and the spare ribs. They’re typically smaller and more curved than spare ribs, measuring about 3-6 inches long. This cut is prized for its tender, juicy meat that literally falls off the bone when cooked correctly. Baby back ribs are also often leaner than their spare counterparts, making them a popular choice for health-conscious barbecue fans.
Differences Between Baby Back Ribs and Spare Ribs
While many people use the terms “ribs” interchangeably, knowing the difference can elevate your cooking experience. The primary distinction lies in their anatomical location on the pig. Baby back ribs are shorter and situated higher up the rib cage, while spare ribs come from the belly side and are larger and meatier. This difference affects cooking time and flavor. Spare ribs often have more fat, lending them a different taste and texture. If you’re aiming for a leaner meal that’s rich in flavor, baby back ribs are a fantastic choice.
In a nutshell, whether you’re cheering on your favorite team during a barbecue or serving up a family dinner, understanding the basics of baby back ribs sets the stage for deliciousness ahead. Now, let’s move on to choosing the best cuts and sources for these delightful ribs!
: The Best Cuts and Sources for Baby Back Ribs
Choosing Quality Baby Back Ribs
When it comes to cooking baby back ribs, selecting the right cut is essential. You want ribs that have an even layer of meat and just a bit of fat. This fat is your friend; it keeps the meat moist during cooking. Look for ribs that have a pinkish-red color and are well-trimmed. Avoid those with excessive bone exposure, as this can lead to dry ribs. Furthermore, a fresh aroma is a good sign that you’re getting quality meat.
*Tip: If you see a layer of silver skin on the back of the ribs, it’s a good idea to remove it before cooking. It can toughen up when cooked, which you won’t want in your tender *baby back ribs*!
Where to Buy Baby Back Ribs: Grocery Stores vs. Butchers
You may be wondering where to find the best baby back ribs. Both grocery stores and local butchers offer good options, but there are pros and cons to each. Grocery stores usually have a standard selection; however, prices can vary. Butchers, on the other hand, often provide fresher cuts and might even let you place a special order if you’re looking for something specific.
In fact, local butcher shops can be an excellent source for quality meat, and they’ll often be happy to share tips on cooking baby back ribs just right. So, whether you’re popping into your favorite grocery store or visiting a butcher shop, ensure you’re getting the best quality for your barbecue.
Here’s a quick comparison table to sum it up:
| Source | Pros | Cons |
|---|---|---|
| Grocery Stores | Convenient, wide selection | May lack freshness |
| Local Butchers | Fresh cuts, expert advice | Often pricier |
Now that you’ve got your ribs selected, let’s jump into the essential tools you’ll need for cooking the perfect baby back ribs!

Essential Tools for Cooking Baby Back Ribs
The Must-Have Tools for Perfect smoked ribs
To cook succulent baby back ribs, you’ll need some essential tools. Here’s a checklist to get you started:
- Grill or Smoker: Either is good for cooking baby back ribs. A grill gives you versatility, while a smoker enhances the flavor.
- Rib Rack: This handy tool allows you to cook multiple racks at once, making it easier to manage outdoor gatherings.
- Meat Thermometer: Ensure your ribs are at the perfect temperature for tenderness. You’ll aim for about 190°F to 203°F for that fall-off-the-bone goodness!
- Tongs: Opt for a sturdy pair. They help you handle hot racks with ease.
- Basting Brush: A silicone brush is best for applying sauce without causing a mess.
- Aluminum Foil: You’ll want this for wrapping your ribs during cooking to keep them moist.
Preparing Your Cooking Space: Setup for Success
Setting up your cooking space can make or break your barbecue experience. First, ensure you have a clean area to work. A clutter-free space lets you concentrate on cooking those baby back ribs without distraction.
Next, arrange your tools and ingredients within reach. This setup will make it easier to move from step to step without running back and forth. If you’re using a grill, preheat it to the right temperature before placing your ribs on it. Making sure your equipment is ready beforehand is key to achieving that tender rib perfection.
Here’s a quick rundown of essential ingredients you’ll need for cooking baby back ribs:
| Ingredients | Quantity |
|---|---|
| Baby Back Ribs | 2 racks |
| Your favorite dry rub | ½ cup |
| Barbecue sauce | 1 cup (for basting) |
By getting the right tools and preparing your cooking space properly, you’re setting yourself up for a rib-cooking win! With everything in place, you’ll soon savor the delectable flavors of your baby back ribs.
Up next, we’ll talk about how to prepare your baby back ribs for cooking, enhancing their flavor and tenderness!
Preparing smoked ribs for Cooking
Clean and dry them.
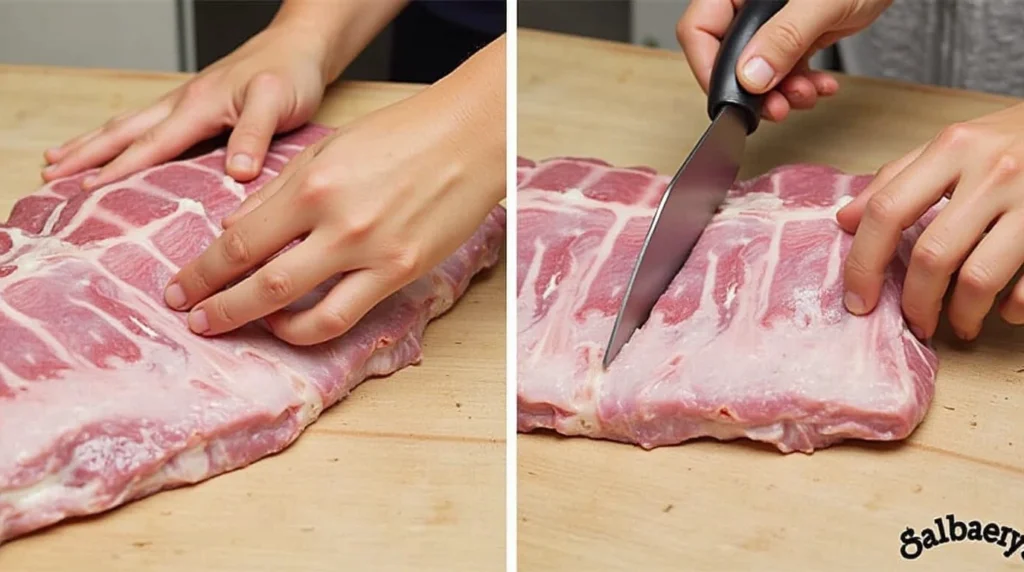
Before you cook yoursmoked ribs, it’s essential to prepare them properly. Start by removing the membrane on the back of the ribs. This thin layer can be tough and chewy, so grab a paper towel for a better grip and pull it off gently. Next, trim any excess fat, but leave a little to keep the ribs juicy during cooking. After this, rinse the ribs under cold water to clean them and pat them dry with paper towels. Proper cleaning not only prepares the meat but also helps flavor absorption.
Seasoning Baby Back Ribs
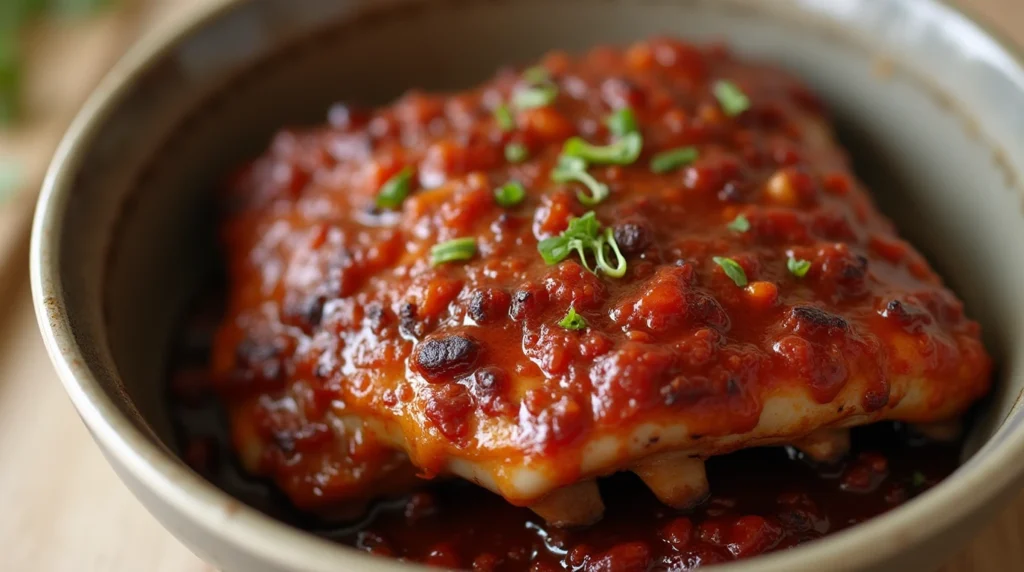
Now, let’s talk about flavor! You can either marinate or use a dry rub to enhance the taste of your smoked ribs. For marinating, combine your favorite ingredients—like soy sauce, garlic, and brown sugar—and soak the ribs in it for several hours or overnight. This method infuses deep flavor. Alternatively, a dry rub, made from a mix of spices like paprika, garlic powder, and brown sugar, adds a wonderful crust as the ribs cook. Whichever method you choose, remember that seasoning is key to delicious baby back ribs!
Here’s a quick seasoning ingredients breakdown:
| Ingredients | Quantity |
|---|---|
| Paprika | 2 tablespoons |
| Garlic Powder | 1 tablespoon |
| Black Pepper | 1 teaspoon |
| Brown Sugar | 1 tablespoon |
With your baby back ribs cleaned, dried, and seasoned, you’re now ready for the cooking adventure! In the next part, we’ll explore various cooking techniques that will leave your ribs perfectly cooked and full of flavor.
Popular Cooking Techniques for Baby Back Ribs
Grilling Baby Back Ribs: Techniques for Perfection
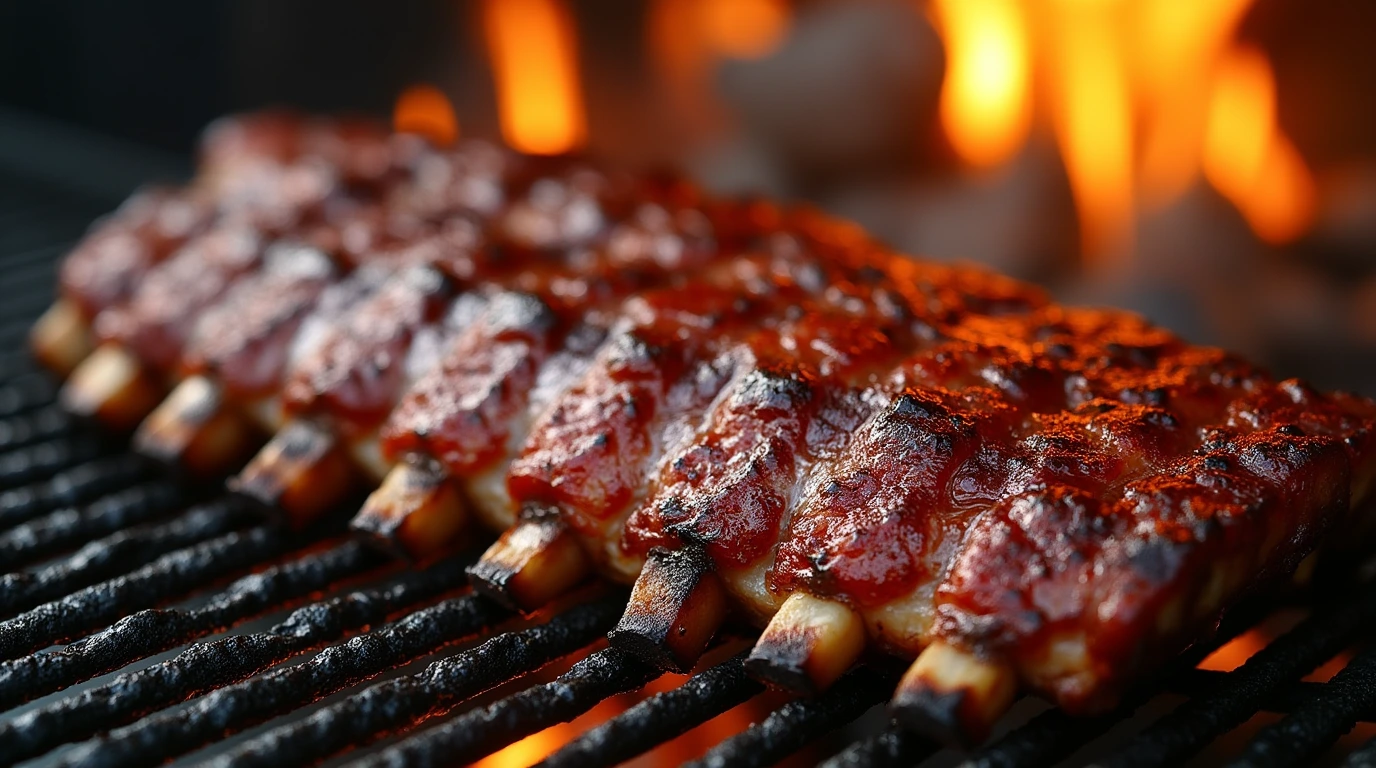
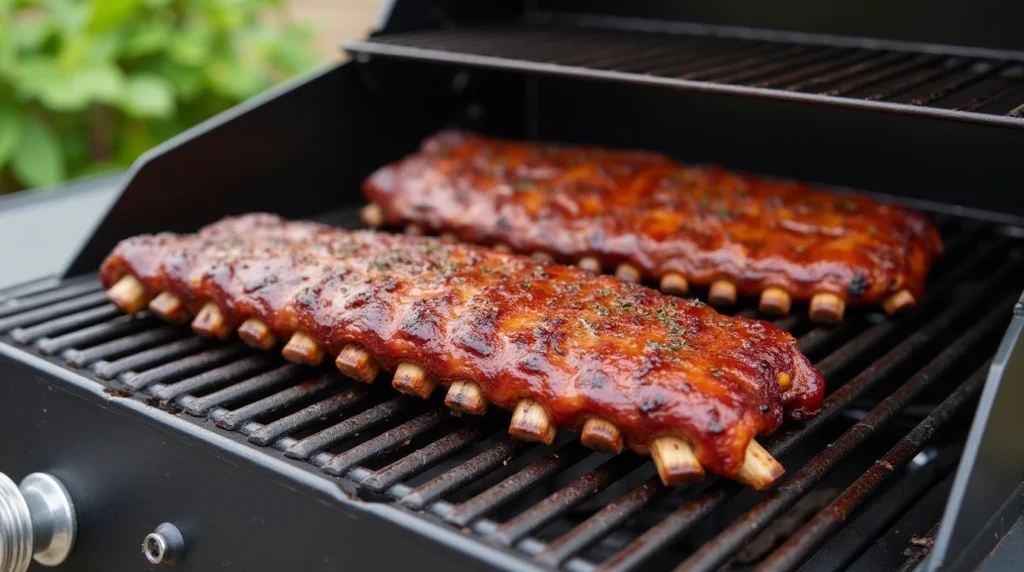
Grilling baby back ribs can be a delightful experience when done correctly. First, preheat your grill to a low temperature, ideally between 225°F to 250°F. Place the ribs on the cooler side of the grill for indirect cooking, which prevents them from drying out. Brush a layer of your favorite barbecue sauce on the ribs.
As you grill, keep the lid closed and let the ribs cook for about 3 to 4 hours. During this time, it’s essential to monitor the temperature. Aim for an internal temperature of around 195°F. This ensures the meat is tender and full of flavor. For an extra touch, you can add a spritz of apple juice every hour to maintain moisture.
Smoking Baby Back Ribs: Step-by-Step Guide
If you’re up for a flavor adventure, consider smoking your smoked ribs. Start by soaking wood chips such as hickory or apple in water for about 30 minutes. Prepare your smoker to maintain a consistent temperature of around 225°F. While the smoker heats up, season the ribs generously with your favorite rub.
Once the smoker is ready, place the ribs inside and let them smoke for about 4 to 5 hours. Every hour, it’s a good idea to check the moisture level and baste the ribs with apple juice or your preferred marinade. The key is having patience as you wait for the flavors to develop. When finished, the ribs should have that beautiful smoky flavor and a tender, fall-off-the-bone texture.
For more delicious recipes, check out our recipe article on grilling techniques or marinades that can elevate your cooking!
: Serving and Pairing Baby Back Ribs
Perfectly Plating Your Baby Back Ribs
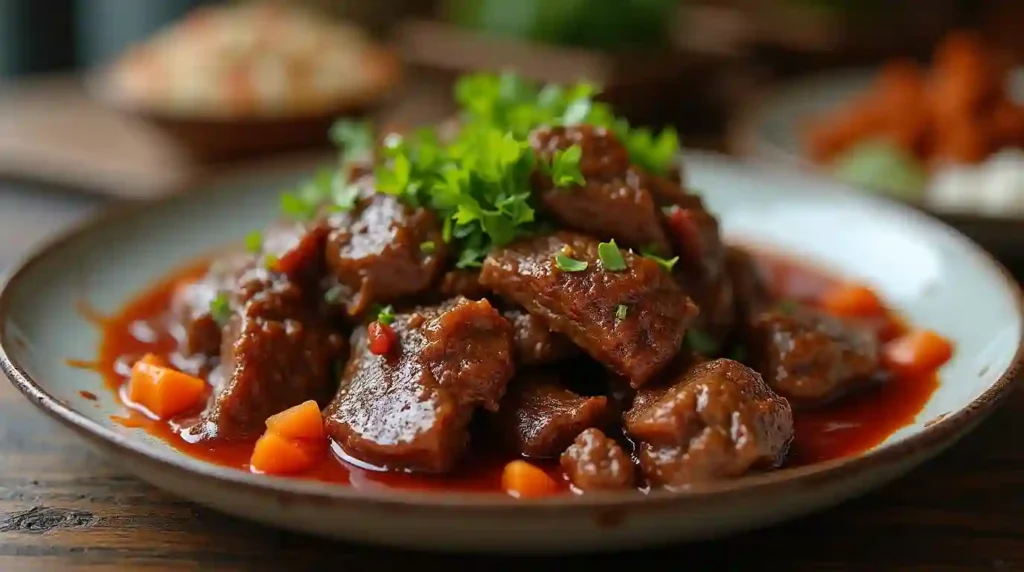
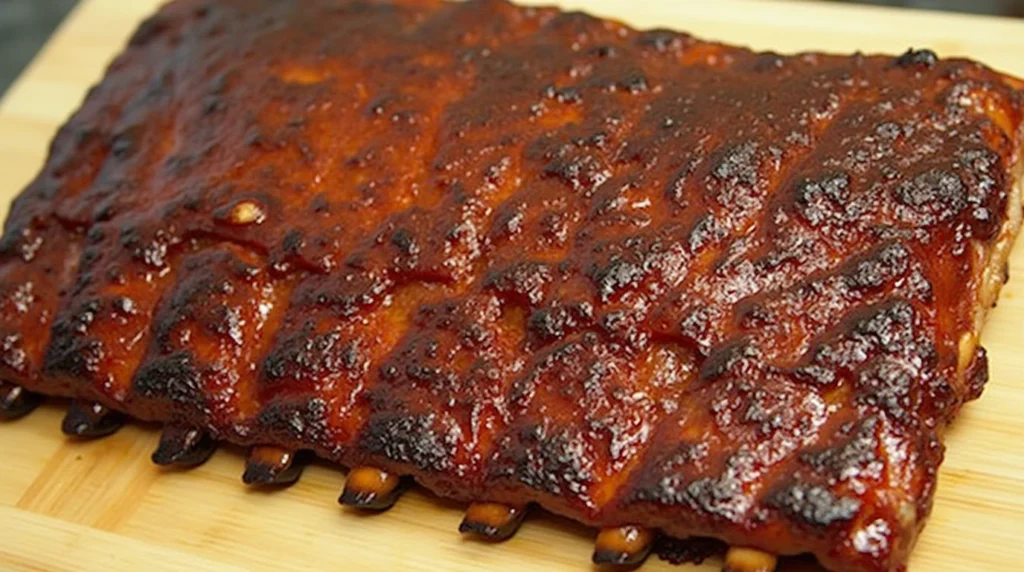
Serving your beautifully cooked smoked ribs is almost as important as cooking them! Begin by removing the ribs from the grill, smoker, or oven. Let them rest for about 10 to 15 minutes before cutting into them; this helps the juices redistribute throughout the meat, resulting in a moist bite.
When you’re ready to serve, slice the ribs between the bones to create individual portions. Arrange them on a large platter. For an appealing presentation, consider garnishing with chopped fresh herbs like parsley or cilantro. Not only does this add a splash of color, but it also pairs deliciously with the rich flavors of the ribs!
Delicious Pairings to Accompany Baby Back Ribs
Choosing the right sides can elevate your baby back ribs to a whole new level. Here are some popular side dishes you might consider:
- Coleslaw: The crunch of coleslaw complements the juicy tenderness of the ribs.
- Cornbread: This classic side provides a sweet contrast to the savory flavors.
- Baked Beans: Hearty and flavorful, they make a great companion to grilled or smoked ribs.
- Grilled Vegetables: Seasoned veggies add freshness and color to your plate.
Don’t forget to offer a variety of sauces on the side. Having different flavors will allow your guests to customize their meals. Additionally, consider serving refreshing drinks, like iced tea or lemonade, to balance the rich taste of the baby back ribs.
By plating your ribs nicely and pairing them with delightful sides, you’ll create a memorable meal that everyone will enjoy!
Storing and Reheating Leftover Baby Back Ribs
Proper storage of leftovers of this recipe
After a delicious barbecue, you may find yourself with extra baby back ribs. To keep them tasting great for later, proper storage is key. Start by letting the ribs cool down to room temperature but don’t leave them out too long—ideally, aim for less than two hours. This helps prevent bacteria from forming.
Once cooled, wrap each rack tightly in aluminum foil. Alternatively, you can place the ribs in an airtight container. For the best results, store them in the refrigerator if you plan to eat them within a few days. If you think you’ll keep them longer, consider freezing them. Frozen baby back ribs can be kept safely for about 2 to 3 months.
Reheating Baby Back Ribs for Maximum Flavor
When you’re ready to enjoy your leftovers, reheating properly will ensure those baby back ribs remain juicy and tasty. If you stored them in the refrigerator, simply remove them from the foil and place them in a baking dish. Preheat your oven to 250°F, cover the dish with foil, and heat for about 20 to 30 minutes until warmed through.
For frozen ribs, first allow them to thaw in the refrigerator overnight. Then follow the same reheating method in the oven. If you want to add a bit of sauce while reheating, feel free—it’ll help enhance the flavor.
With these tips, you can enjoy your smoked ribs even after the main feast is over! Whether you’re storing or reheating, you’ll make the most of your leftover barbecue delight. Happy eating!
Tips for Getting the Perfect Recipe Every Time
Choosing the Right Type of Baby Back Ribs
When it comes to cooking this recipe, selection is crucial. Always start by choosing high-quality ribs. Look for meat that has a good amount of marbling; this means small streaks of fat throughout the meat. This fat is essential because it keeps the baby back ribs juicy and enhances their flavor during cooking.
In addition, check for ribs that are a uniform color and feel fresh. Whether you buy them from a butcher or a grocery store, always inspect them carefully. Additionally, buying locally sourced meat can often mean better quality, as it usually travels shorter distances.
Mastering Cooking Times and Temperatures
To ensure your baby back ribs turn out perfectly every time, mastering cooking times and temperatures is vital. Generally, you will want to cook these ribs low and slow. If you’re grilling, aim for a temperature of around 225°F to 250°F.
Moreover, it’s crucial to monitor the cooking time. Depending on the cooking method, this recipe may take anywhere from 2 to 5 hours to become tender. If you’re using a smoker or an oven, the key is to use a meat thermometer. Ideally, the internal temperature should reach at least 190°F to 203°F, indicating the meat is tender.
Final thoughts on this special recipe
As you venture into making baby back ribs, remember that practice makes perfect. Don’t be afraid to experiment with different rubs and sauces to find your perfect flavor. The joy of cooking lies in trial and error, so learn from each cook and adjust your techniques accordingly.
In conclusion, with the right ingredients, cooking methods, and a willingness to experiment, your baby back ribs will be a hit at any gathering. Enjoy the process, share your meals with friends and family, and indulge in the deliciousness of perfectly cooked ribs. Happy cooking!